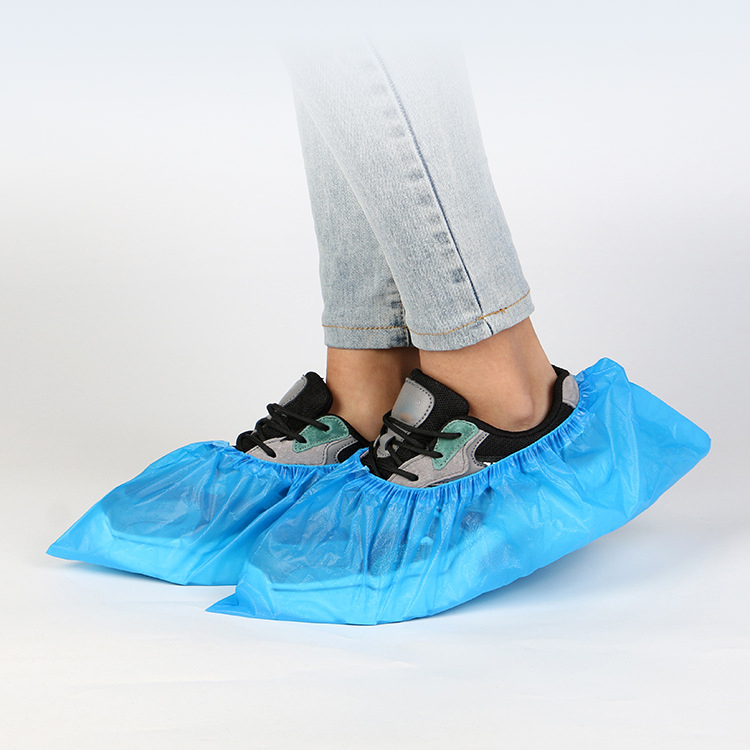
How to Cover Shoes with Lace: A Comprehensive Guide with Q & X
In pursuit of personalization and fashion, the art of shoe accent coordination has come to be an crucial ability. mastering a way to cleverly hide lace (lace laces) inside the shoe now not best requires the suitable securing method however additionally attention to daily renovation and care. this text will offer you with special steps to guide you on the way to ensure the comfy fastening of lace, while keeping off needless damage, keeping your shoes usually easy and aesthetically appealing.
Preparation Work: Materials and Tools Introduction
earlier than beginning to cowl shoes with lace, making ready the correct substances and equipment is vital. here is a detailed list to assist make sure the entirety is prepared:
-
Shoe lace: select suitable lace in keeping with the dimensions and fashion of the shoes. there are various colors, substances, and patterns available in the marketplace, so you can pick out in keeping with your private desire and the appearance of the shoes.
-
Adhesive: pick out an adhesive suitable for the shoe cloth. common alternatives include robust glue, warm soften glue, and double-sided tape. make certain the adhesive gives sufficient adhesion to the footwear without destructive the material.
three. Scissors: a pointy pair of scissors for trimming the lace, ensuring the reduce edges are clean and neat.
- Ruler: Used to measure the length of the footwear, ensuring the lace is the proper length and now not too lengthy or too quick.
five. Shoe lace hook or clip: in case you plan to apply a shoe lace hook, prepare some appropriate hooks. If the usage of a clip, make certain it can securely clamp the lace.
-
Q-suggestions or a small brush: Used to smooth up any extra adhesive residue, retaining the shoe floor easy.
-
clean material: Used to clean the shoe floor, ensuring it’s far dirt-unfastened to permit the adhesive to adhere better.
eight. Tape: Use obvious tape as a transient fixative for the duration of the system to help the lace live in place till the adhesive dries.
nine. warmness gun: in case you are using hot soften glue, you could want a heat gun to warmness the adhesive to solidify quick.
- Workbench: put together a flat workbench to maintain the lace and footwear solid at some point of operation.
After making ready those materials, you can start the following steps:
- easy the footwear to make certain the surface is clean and dirt-loose, permitting the adhesive to adhere better.
- degree the shoe length and reduce the lace consistent with the measurement results, ensuring the lace length matches the footwear.
- If wanted, use tape to briefly restoration the lace at the shoe to adjust its position before the adhesive sets.
- choose the suitable adhesive and apply it calmly to the on the lace and shoe floor in step with the product commands.
- Use the shoe lace hook or clip to secure the lace, making sure the lace remains in the suitable function before the adhesive units.
- If the usage of warm soften glue, use the heat gun to warmness the adhesive to solidify fast.
- look ahead to the adhesive to completely dry, which typically takes a couple of minutes to several tens of mins, relying at the type of adhesive used.
- Use Q-guidelines or a small brush to smooth up any extra adhesive residue.
- test the lace’s fixation to make certain it is comfy and adjust in your satisfaction.
With those arrangements, you’ll lay a strong basis for successfully covering the shoes with lace.
Clean and Dry: Ensure the shoes are clean and free of dust.
earlier than making use of lace in your footwear, cleansing and drying are essential steps. here is a detailed guide on a way to make certain your shoes are smooth and freed from dirt:
-
smooth the shoe floor: begin by means of gently wiping the shoe floor with a soft material to dispose of dirt and stains. For more difficult spots, use a small amount of slight purifier and a wet material for neighborhood cleansing.
-
put off indoors dust: Use a small brush or gentle bristled toothbrush to gently brush away dust inside the shoes, particularly inside the seams and crevices of the tongue and insoles where dust might also collect.
-
take a look at the shoe soles: smooth the soles with a brush or a wet material to eliminate dust and dust. For stubborn stains, use a small knife to gently scrape them away.
four. keep away from direct water: For a few shoe materials, such as leather footwear, direct water cleaning can cause damage. therefore, if shoes are not appropriate for washing, avoid the use of water.
five. Use a vacuum cleanser: If the footwear are of fabric cloth, use the soft brush attachment of a vacuum cleaner to do away with dust from the shoe floor.
-
allow to dry: place the wiped clean shoes in a properly-ventilated and dry area, keeping off direct daylight to save you the shoes from warping or fading.
-
Use shoe trees: during the drying process, insert shoe trees to assist the shoes maintain their original shape and save you deformation as moisture evaporates.
eight. avoid wet environments: make certain that the shoes are stored away from moist areas, together with bathrooms or near radiators, to save you mold because of moisture.
-
often look into: check the footwear often for drying situations and ensure they’re absolutely dry before intending to the lace covering step.
-
deal with unique stains: If there are hard-to-put off unique stains on the footwear, use a professional shoe cleanser or a special cleansing tool to deal with them.
by means of following those steps, you may make sure that your footwear are in most efficient circumstance earlier than applying lace, which not most effective allows with the comfortable adhesion of the lace but additionally extends the lifespan of the footwear.
Measure and Cut: Precisely measure the shoe size and cut the laces.
To make certain that the lace suits the footwear perfectly, particular dimension and cutting are key steps. here is a detailed operation procedure:
-
deciding on the precise Lace: before beginning the size, first pick out a lace that matches the style and shade of the footwear. verify the cloth and width of the lace to ensure they are able to fit the fashion of the shoes.
-
Measuring the Shoe length: location the footwear flat on a stage surface, and use a tender ruler to measure the shoe period and width alongside the inner edge of the shoe. when measuring the shoe period, start from the front quit of the shoe heel and stop at the the front stop of the shoe toe. while measuring the shoe width, pick out the widest part of the shoe for dimension.
-
Marking the Lace duration: based totally on the shoe period size outcomes, mark the specified length at the lace with a marker pen or chalk. If the lace is simply too lengthy, you’ll additionally need to mark the reducing role.
four. Measuring Lace Width: degree the width on both sides of the lace to ensure that the lace can also healthy the shoe establishing in width.
five. booking Elastic area: On the basis of the marked length, reserve the suitable quantity of stretch space for the lace. typically, an extra 1-2 centimeters can be brought to the shoe duration.
-
attempt-on the Lace: put the lace on inside the shoe to check if it fits. If the lace duration or width is not appropriate, modify the marking till the lace can without difficulty bypass through the shoe commencing and have some motion area in the shoe.
-
prepare reducing gear: select a sharp pair of scissors or a lace cutting blade to ensure that the lace can be easily reduce for the duration of reducing, at the same time as avoiding harm to the lace texture.
-
reducing the Lace: place the lace on a flat work surface, align the ruler with the marked function, and thoroughly reduce alongside the marked line. when slicing, ensure that the pressure is even, heading off twists or breaks within the lace.
nine. test the cutting impact: After reducing, attempt the lace on within the shoe once more to test if the cut lace suits the shoe length and if the ends of the lace are flat.
- Trim the rims: If the edges of the lace are not smooth, use sandpaper to softly sand down any sharp corners to make sure consolation for the duration of sporting.
by using following these steps, you may make sure that the lace fits the shoe length precisely, laying an amazing foundation for the following fixation work.
Temporary fixation method one: using tape for temporary fixation
select the proper tape: select a obvious or color-matching tape to the shoe’s surface to reduce the visible effect after fixation.
smooth the shoe surface: make certain the shoe surface is smooth and free of dirt earlier than solving the lace, to prevent the tape from adhering to any stains.
decide lace function: study the shoe and mark the positions of the holes thru which the lace must bypass, making sure the lace order matches the layout.
apply starting tape: on the start line of the lace, that is the threshold of the primary pair of holes, observe a small section of tape to secure the beginning role of the lace.
Thread thru holes: gently pull the lace tight and thread it thru each marked hollow, making sure the lace does no longer slip.
briefly fix: After threading through every hole, practice every other small section of tape at the brink of the hollow thru which the lace has passed for brief fixation.
modify tension: in the end holes had been threaded, test the tension of the lace to make sure it’s miles neither too tight to reason soreness nor too loose to fall off.
Repeat fixation: For each hollow, repeat the process of applying tape to make certain the lace is securely fixed at each function.
check usual effect: Stand in front of the shoe and study the general impact of the lace, adjusting the placement and period to make it look even and aesthetically appealing at the shoe surface.
prepare for final fixation: as soon as the lace function is suitable and securely constant, prepare for the very last fixation to do away with the brief tape.
be aware of details: at some point of the fixation system, pay attention to the course and form of the lace to keep away from any twists or creases.
Fixed Method Two: Use shoelace buckles or shoelace clips
-
pick out the correct shoe lace fastener or clip: based on the lace material and shoe size, choose a appropriate shoe lace fastener or clip. make certain they are able to securely fasten the lace without inflicting harm to the shoe.
-
clean the lace holes: Use a smooth material or cotton swab to dispose of dirt and debris from the lace holes at the shoe, ensuring the lace can pass via easily.
three. Open the shoe lace fastener or clip: lightly pull the discharge buckle of the shoe lace fastener or clip to open it.
- Thread the lace: bypass the ends of the lace thru the shoe lace holes, ensuring the lace aligns with the inner shape of the shoe.
five. comfortable the lace: Insert the give up of the lace into the slot of the shoe lace fastener or clip, and press gently to at ease it. If the use of a clip, ensure the lace is firmly clamped.
-
alter lace role: After securing the lace, check the tightness, making sure it’s miles flippantly disbursed within the shoe, neither too tight to motive pain nor too unfastened to shift.
-
test the fastening impact: After securing the lace, gently pull on it to take a look at if it’s far stable. If the lace can resist some anxiety with out coming unfastened, it indicates an awesome fastening.
-
modify the fastener: If the lace is not sufficiently cozy, attempt adjusting the position of the shoe lace fastener or clip to make it greater snugly in shape the lace holes.
-
Reset the fastener: once the lace is securely mounted, reset the release buckle of the shoe lace fastener or clip to make sure they’re closed.
-
test the overall effect: Recheck the lace function and fastening, ensuring the shoe looks neat and tidy without a excess lace sticking out.
-
depart room for adjustment: If in addition adjustment of the lace is wanted, depart a few area throughout the fastening procedure to permit for smooth subsequent high-quality-tuning.
-
entire the fastening: confirm that the lace is securely fixed for your satisfaction, and continue with any next adhesive work to ensure the lengthy-time period stability of the lace.
by using following those steps, you could briefly fasten the lace the use of a shoe lace fastener or clip, imparting a solid start line for subsequent adhesive paintings.
Select an appropriate adhesive to ensure the lace is securely fastened.
whilst selecting an adhesive, don’t forget its adhesion, sturdiness, and compatibility with the material. here are a few typically used adhesives and their software methods:
-
warm soften Adhesive: appropriate for numerous substances which includes plastics, leather-based, and artificial substances. to apply, warmness the glue gun to the precise temperature and apply the hot melt adhesive flippantly at the back of the lace and the corresponding vicinity on the shoe upper. Press the lace onto the shoe top fast and keep for a few seconds to ensure bonding.
-
Double-Sided Tape: With mild adhesion and simplicity of use, pick double-sided tape suitable for the shoe upper cloth. attach it to the back of the lace, ensuring the tape covers the complete width of the lace. Then, lightly press the lace onto the shoe top and use your palms or a tool to press the edges firmly.
-
notable Glue: Cyanoacrylate glue (CA glue) is appropriate for situations requiring high adhesion. practice the glue carefully to the returned of the lace and the contact points on the shoe top, and press the lace into vicinity speedy. This glue remedies in a quick time, so the operation wishes to be swift.
-
Shoelace Adhesive: There are adhesives specifically designed for shoelaces to be had in the marketplace. they’ve moderate adhesion and are clean to use. practice the shoelace adhesive to the returned and speak to regions of the lace, then press it into location. This kind of adhesive generally has true water resistance.
-
particular Adhesives: choose adhesives according to the shoe upper cloth, together with leather-specific glue or plastic-particular glue. comply with the commands at the adhesive and practice it lightly to the touch surfaces of the lace and shoe higher to make certain precise contact.
make certain that the lace is tightly mounted by way of following those techniques:
-
Even Adhesive software: while applying the adhesive, ensure now not to apply an excessive amount of or too little, as this could have an effect on the bonding effect.
-
urgent to comfortable: Press the lace onto the shoe higher to make certain the adhesive is in full touch with the shoe surface. Use a tool (which include a pressure board) to help press it right down to save you the lace from shifting.
three. Curing Time: watch for the adhesive to absolutely treatment in keeping with the curing time of the selected adhesive. avoid the shoe being struck or squeezed in the course of the curing procedure.
- test at appropriate instances: After curing, gently contact the lace to check if it’s miles secure. If there’s any looseness, reapply the adhesive and press it into vicinity again.
five. publish-Processing: After curing, test if the lace is flat, and if essential, use scissors or sandpaper for minor changes.
with the aid of the use of these techniques to choose the ideal adhesive and make certain the lace is securely fixed, you could refresh the look of the footwear and enlarge their lifespan.

Adjust and trim: inspect the position and length of the lace and make fine adjustments.
To make sure that the lace is each aesthetically attractive and useful after it has been constant, specified adjustments and trimming are important steps. right here is a detailed description of this technique:
-
check the placement of the lace: Straighten the lace on the shoe, making sure it’s far evenly dispensed alongside the threshold of the shoe’s higher. observe if the lace is focused on the shoe’s center line. If there may be any deviation, lightly regulate the start line of the lace to middle it.
-
study the lace’s path: cautiously look into whether or not the lace forms a clean curve at the shoe’s upper, heading off any abrupt creases or twists. If the lace’s course is unnatural, you could accurate it by means of adjusting the location of the lace thru the lacing holes.
-
alter the tightness of the lace: at the constant points, gently pull the lace together with your hand to test its match at the shoe’s higher. If the lace is simply too tight, it may purpose discomfort or the lace to effortlessly come free; if too free, it could affect the neatness of the shoe’s upper. adjust the tightness appropriately to make it relaxed yet comfy.
-
test the duration of the lace: study if the lace is too long or too brief. Too long may additionally purpose the lace to sway while strolling, whilst too brief might also have an effect on the decorative impact of the lace. If the period isn’t always suitable, re-cut the lace to ensure it fits the width of the shoe.
-
Trim the ends of the lace: Fold the ends of the lace well and use a lighter to gently burn them together to prevent them from unraveling. Be cautious to control the heat to keep away from overheating and deforming or burning the lace.
-
verify the stability of the lace: After finishing the modifications, take a few steps to feel the stability of the lace. If the lace loosens or slides all through walking, recheck the constant factors and can need to growth the wide variety of fixations or update the adhesive.
-
have a look at the general impact: View the arrangement and fixation of the lace from different angles to make certain it bureaucracy an aesthetically appealing pattern on the shoe’s upper. If a few components are not ideal, modify the lace’s function or refix it once more.
-
final confirmation: in spite of everything modifications and trimming are complete, check the general effect of the lace again to make certain it is comfortable, properly positioned, appropriately sized, and does not have an effect on comfort whilst strolling.
by means of following those steps, you could ensure that the lace is fixed at the shoe each superbly and securely, including a completely unique character and charm to the shoe.
Ensure that the lace is securely fastened and there are no excess parts.
After securing and bonding the lace, the following final inspection steps ought to be carried out to ensure its firmness and absence of extra elements:
-
take a look at the general route of the lace: cautiously look into the arrangement of the lace on the shoe to ensure it’s miles even, and there are not any obvious twists or choppy areas. ensure each step of the lace follows the strains of the shoe easily.
-
test the anxiety of the lace: lightly pull on both ends of the lace to feel its uniform anxiety. in case you find that a specific section of the lace is simply too tight or too free, it desires to be readjusted to healthy the surrounding lace.
-
check the drying condition of the adhesive: expecting the adhesive to absolutely dry is important. gently touch the adhesive along with your arms to feel its hardness. If the adhesive continues to be sticky or has a liquid consistency, wait longer or follow it again.
-
check the lace fastening points: lightly press at the lace fastening points to study any symptoms of looseness or detachment. If the adhesive isn’t always sufficiently cozy, reinforce it without delay.
-
examine the ends of the lace: ensure that the ends of the lace had been nicely trimmed and there are not any unfastened threads. extra threads not best have an effect on the arrival but can also motive harm to the lace through the years.
-
take a look at the in shape of the lace: placed on the shoe and check if the lace is absolutely flush with the shoe top, and not using a protruding threads or bumps. If there are bumps in positive regions, you can want to regulate the lace’s position or reapply the adhesive.
-
take a look at the tightness of the lace: After putting on the shoe, walk a few steps to experience if the lace is snug. If the lace is simply too tight, it could cause pain; if too unfastened, it could have an effect on the fixing effect.
-
examine the general look of the shoe: Stand at exclusive angles to examine the shoe, ensuring that the lace layout and color are in concord with the overall style of the shoe, with out a apparent colour discrepancies or choppy bonding marks.
-
Get a person else to check: If feasible, have someone check the shoe from the side, front, and again to get a extra complete angle, making sure that the lace’s solving is impeccable.
by using carefully going via these steps, you may make certain that the lace is firmly constant at the shoe, without any extra elements, and looks tidy, reaching the desired ornamental effect. If any problems are determined in the course of the inspection, they need to be corrected directly to make certain the very last result is exceptional.
Care and Maintenance: Daily Care to Prevent Lace Damage
To ensure proper care and upkeep of lace, here are some key factors for day by day care:
-
keep away from direct sunlight exposure: prolonged exposure to daylight can reason the lace color to vanish and the material to age. consequently, save the shoes in a shaded vicinity, along with a shoebox or a shelf in a dark corner.
-
regularly easy off dirt: lightly wipe the surface of the footwear with a easy gentle material to cast off dust. keep away from the usage of tough fabrics or brushes to save you scratching the lace fabric.
-
prevent moisture: Moisture is a prime perpetrator in destructive lace. ensure the footwear aren’t stored in a damp environment, specifically at some stage in the rainy season or in regions with excessive humidity. If the footwear get wet by chance, dry them with a dry fabric as quickly as feasible and keep away from using a hairdryer with hot air to save you harm to the material.
-
Use the correct cleansing method: If the lace gets stained, lightly wipe it with soap and water, then smooth with a smooth fabric dipped in clean water. Do not use chemical cleaners or scrub too vigorously to keep away from destructive the lace shape.
-
prevent lace from tangling: when the use of lace, keep away from tying knots or twisting it, as this may make it hard to untangle or purpose damage later on. while lacing up or adjusting the footwear, preserve its herbal kingdom.
-
regularly replace lace: over the years, lace may become unfastened or spoil due to put on and growing older. update lace promptly when you be aware those troubles to preserve the comfort and appearance of the footwear.
-
prevent static electricity: Static electricity can appeal to dust and dirt, affecting the cleanliness of the lace. Use anti-static spray or upload a small amount of anti-static agent to lessen static buildup.
-
keep away from squeezing footwear while storing: whilst storing footwear, be cautious no longer to location heavy objects at the lace, as this will deform or harm it.
-
frequently investigate insoles and liners: insoles and liners can affect the lace’s keep. regularly take a look at and update broken insoles and liners to increase the life of the lace.
via following these every day care and protection measures, you can efficaciously lengthen the lifespan of the lace and keep the footwear clean and beautiful.